Installing the Remote Workstation Card Software for Windows
Teradici strongly recommends that you install the version of Remote Workstation Card Software that is released with the version of the firmware loaded on the Remote Workstation Card and PCoIP Zero Client. For details, see Firmware Compatibility Matrix. It is also recommended that users should not install the Remote Workstation Card Software while connected to the PC/workstation from a soft client to avoid the possibility of not having access to the local keyboard and cursor.
Before you install the software, you must enable the Host Driver Function on the PCoIP Remote Workstation Card.
Do not install Remote Workstation Card Software in systems with multiple Remote Workstation Cards
The Remote Workstation Card Software is not designed to work in systems with more than one Remote Workstation Card. Do not attempt to install and use this software in systems with more than one Remote Workstation Card.
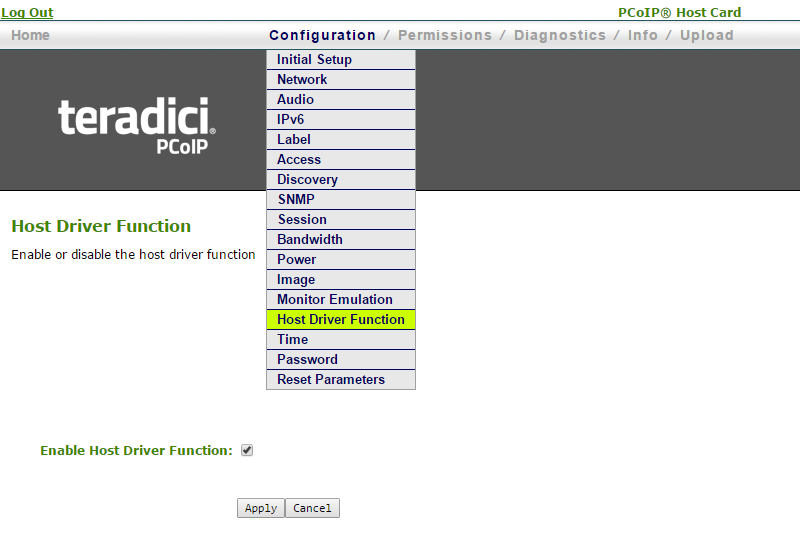
Enabling Host Driver Function
To enable the Host Driver Function on the PCoIP Remote Workstation Card:
-
Open a web browser on a PC or workstation connected to the same network as the PCoIP host computer. Browse to the Remote Workstation Card’s webpage, and log in.
-
From the Configuration menu, select Host Driver Function.
-
Check the Enable Host Driver Function option and click Apply. A prompt appears to indicate the host PCoIP processor must be reset.
-
Click Reset and then click OK to schedule a deferred reset.
-
Restart the PCoIP host by restarting the PC or workstation.
-
After the workstations boots, log into the PC or workstation.
-
If a Found Hardware dialog appears after logging into Windows, click Cancel.
Installing Remote Workstation Card Software
The Remote Workstation Card Software for Windows is provided as a msi file or Windows installation package.
You must have administrative rights to install the software.
Cannot run installer while connected using a soft client
As an administrator, you cannot run the Remote Workstation Card Software installer while connected to a host system using a soft client. The local cursor feature is disabled during the installation process. This disables the user’s keyboard and mouse, and prevents the user from completing the installation process.
You can run the installer by:
-
Connecting to the host using RDP or VNC.
-
Connecting to the host using a zero client in a non-VMware View brokered environment.
-
Connecting a monitor, keyboard, and mouse directly to the host system.
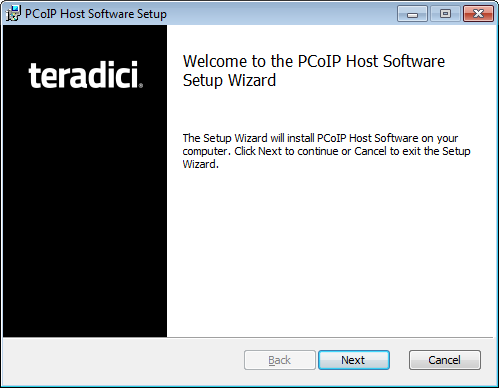
To install the software:
-
Double-click the installer file. The welcome screen appears, similar to the example shown next.
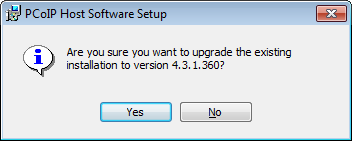
-
If a previous version of the remote workstation card software is installed, a confirmation dialog will be displayed. Click Yes to continue.
-
Review and accept the terms of the End User License Agreement and click Next to proceed.

-
Accept the default installation path or click Change to set a custom path. Click Next to proceed.
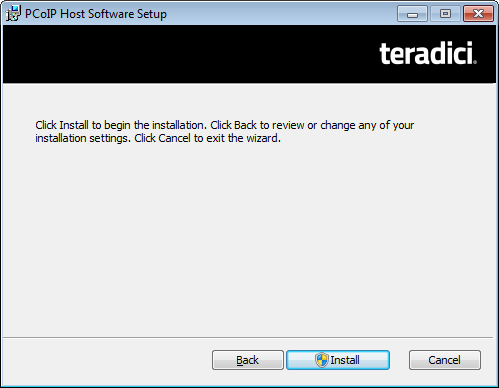
-
Click Install to start the installation process.
-
During the installation process, the installer might need to reboot. If so, click OK or Yes to reboot the PC or workstation. After rebooting, the installing continues the installation.
-
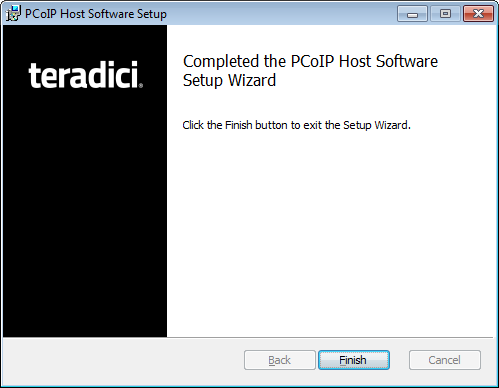
When the installation is complete, click Finish.
Error during installation
If you experience issues during installation, rerun the Setup Wizard or reboot the workstation and try again.