Single-Node Anyware Trust Center Installation
For small deployments, or as a proof-of-concept test, you can deploy the Anyware Trust Center using the included trust-center-ctl script. This script will create a single-node Kubernetes cluster and install the Anyware Trust Center and its dependencies.
Deploying the Anyware Trust Center involves the following steps:
- Create a new VM to host the Anyware Trust Center.
- Choose a domain name for connections to the Anyware Trust Center.
- Configure DNS for the new machine.
- Get the installation script from our website.
- Run the installation script on the Anyware Trust Center machine.
1. Create a New VM
Deploy a dedicated server to host the Anyware Trust Center. The method used to do this will depend on your environment; if you are unsure how to proceed, ask your system administrators.
The Anyware Trust Center requires a dedicated server with the following specifications:
| Requirement | |
|---|---|
| Operating System |
|
| CPUs | 4 vCPUs |
| Memory | 16GB RAM |
| Disk | 120GB+, including 80GB+ disk space on /var for persistent volumes |
| Network |
|
| Python | The post-installation and initialization scripts require Python 3.8.2+. |
| Other software | The OS must have cURL available. |
2. Choose a Domain Name
The Anyware Trust Center requires 5 domain names added to your DNS records. In this step, you're creating the base domain for the Anyware Trust Center, which will be used to construct the other 4 subdomains. You'll use this value in multiple locations during setup, so record the value and be ready to copy it.
In this procedure, we will use trust-center.example.com to demonstrate the domain name, and how it is leveraged to create the other required values.
3. Create DNS Records
Once your new dedicated server has been created, you must set up the following DNS A records that point to it. For each of the following items, replace <domain-name> with the domain name you recorded in the previous step.
<domain-name>api.<domain-name>endpoint-connector.<domain-name>ota.<domain-name>register.<domain-name>
Important: Supporting automatic Anyware Trust Center discovery
If you plan to support automatic Anyware Trust Center discovery by endpoints, you must also create a CNAME record that redirects anywaretrustcenter to register.<domain-name>.
Example: using trust-center.example.com
Using trust-center.example.com as the base domain, you would create DNS records for the following:
trust-center.example.comapi.trust-center.example.comendpoint-connector.trust-center.example.comota.trust-center.example.comregister.trust-center.example.com
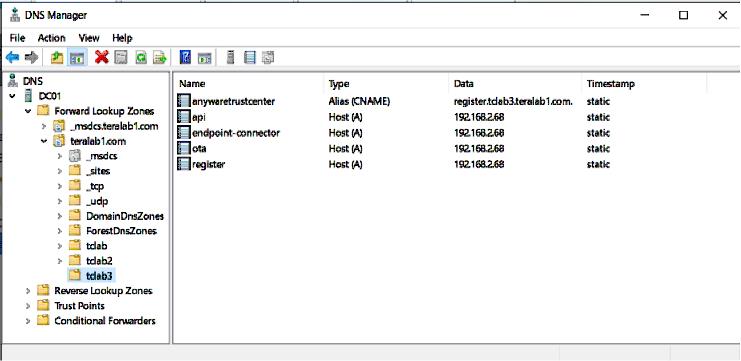
This example shows a different DNS configuration using Windows DNS Manager:
4. Get the Installation Script
Note: Support account is required
To download the Anyware Trust Center installer, you must have an account on our support site (https://help.teradici.com). You can create one from the login screen if you don't already have one.
To download the installer:
- Go to https://anyware.hp.com/find/product/anyware-trusted-endpoints/2024.03/anyware-trust-center.
- If you are not already logged in, click Log in to download and authenticate your session.
-
Click Downloads and scripts:

-
Read and accept the End User License Agreement. Once the agreement has been accepted, the download form is shown:
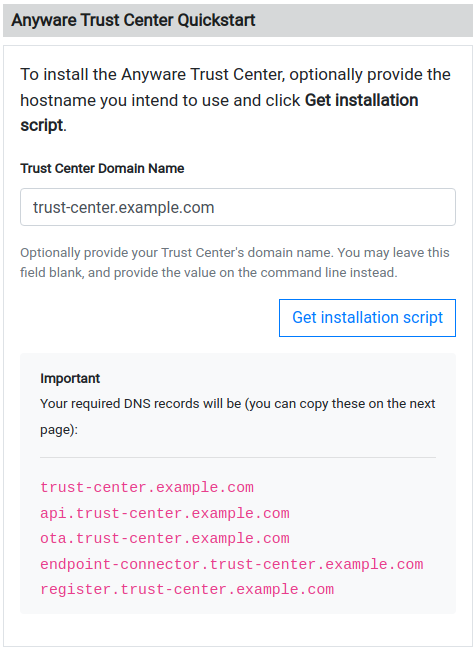
-
Provide your chosen FQDN—recorded earlier—in the Trust Center Hostname (FQDN) field, and click Get installation script.
Note: FQDN field is optional
The FQDN value is required to run the installer, but you do not have to supply it here. If you leave this field blank, you must manually add the actual FQDN to the script command before executing it.
-
The website will generate a download command and display it:
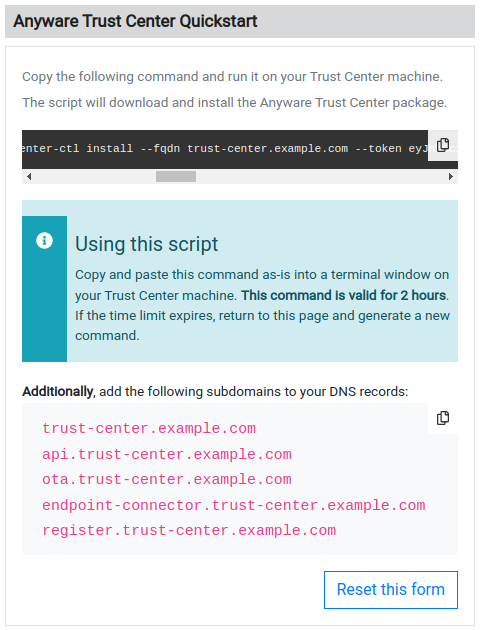
Copy the entire command displayed. There are two parts, and both are required: a curl command that downloads the installation script, and second command that executes the script.
The installation script command looks like this:
curl -sSL https://dl.anyware.hp.com/{token}/trust-center/raw/names/trust-center-tgz/versions/{version}/trust-center_{version}.tar.gz | tar -xz && sudo ./trust-center-ctl install --fqdn {trust-center-FQDN} --token {jwt token}Important: This script is time-limited
The generated command is valid for 1 hour
, after which installation will fail. If that occurs, return to the download page and generate a new command.
The rest of the steps below take place on the Anyware Trust Center VM. If you acquired the script command on a different machine, transfer it to the Anyware Trust Center VM using any acceptable method.
5. Run the Installation Script
-
Create or choose a directory on your newly-created VM, and enter it. The following example will create and enter a new
tc-installationdirectory:mkdir tc-installation cd tc-installation -
In a terminal window, paste the installation script command you copied earlier.
The installation script will download all required packages and install them on the machine. The installer takes approximately 15 minutes to complete. There will be periods of time where the process stops printing messages to the terminal and may appear to hang; this is normal.
Note: Troubleshooting problems
If you encounter breaking issues during installation, see troubleshooting for help.
When executed, the installation command does the following:
- Downloads the archive for the installer executable
- Unzips the installer
- Run the installer as root, passing in two required flags:
fqdn: The value must be a valid fully-qualified domain name using only lowercase letters, numbers, and periods, and should point to the location where the Anyware Trust Center is installed.token: the JWT token provided by the support site. This value should not be modified, and is valid for one hour after creation.
Note: Installation certification errors
You may see certification errors during installation, which are related to a plugin for Anyware Manager. These errors can be disregarded.
After installation completes, you will see a message similar to this:
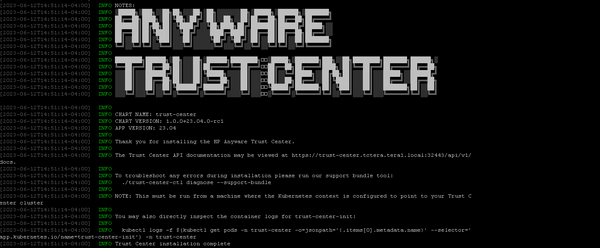
-
To validate the installation, run the following command:
sudo ./trust-center-ctl diagnoseAll services should report healthy.
After Installing
After installation completes, you can set up your management tool to interact and manage Trusted Zero Clients via the Anyware Trust Center.
Refer to the API documentation installed with the Anyware Trust Center for complete details.
Note: The administrator password is automatically generated
The administrator password is automatically generated by the Anyware Trust Center installer, and has the ability to create service account keys. The generated password is placed in the config.yaml file in your installation directory.
<installation_folder>/config.yaml:
global:
images:
    registry: "docker.cloudsmith.io/teradici/trust-center"
    username: "teradici/trust-center"
    password: <repository password>
tc:
    domain: <your domain>
    password: <this is the auto-generated password>
    endpointUpdate:
      accessKey: <repository password>
      repository: "teradici/trusted-zero-client"
Troubleshooting
Installation failures
Installation can fail on some distributions or environments unless additional configuration is done. Check the additional configuration requirements listed above. If any steps were missed:
- Uninstall the Anyware Trust Center
- Perform the relevant configuration steps
- Install the Anyware Trust Center again. You will likely need to return to the download site and generate a new download command.
Creating a Support Bundle
Support bundles are archives that capture the current state of the Anyware Trust Center, and are used by our support team to diagnose and troubleshoot issues you may experience.
If you need to contact support, generate a support bundle using the procedure detailed in Creating a Support Bundle.