Connecting to a Remote Host
The Trusted Zero Client can connect to any Windows, Linux, or macOS host with a PCoIP agent installed, Remote Workstation Cards, and Amazon WorkSpaces desktops. Connections can be made directly (client direct to host), or brokered through Anyware Manager, an Anyware Connection Manager, or VMware Horizon (beta).
Creating Your First Connection
Important: Connections are policy-controlled
The ability to create and modify connections may be limited or removed by your deployment administrators. If these views are not available, they have been preset on the Anyware Trust Center and you can skip to Connecting to a Session.
The first step is to create a connection between your Trusted Zero Client and your remote desktop. This connection is made either to your connection broker, for managed deployments, or directly to a remote host.
-
Launch the Trusted Zero Client.
-
If this is your first connection, the Trusted Zero Client will prompt you to create one:
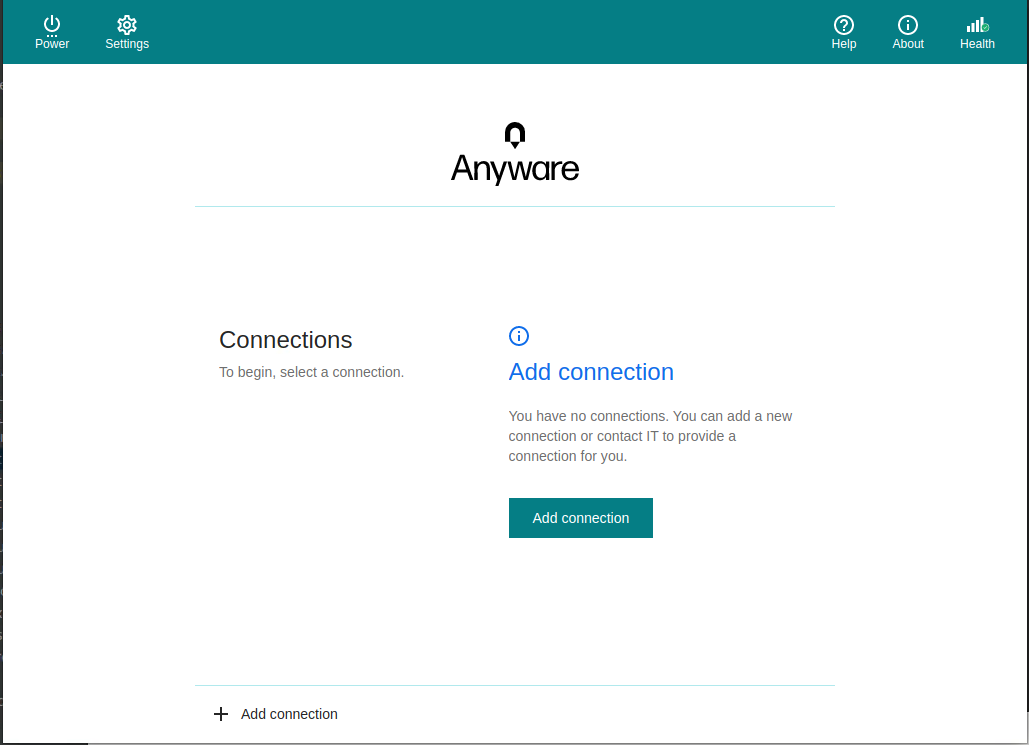
Click Add a new connection, and proceed to the next section.
Creating a New Connection
Important: Connections are policy-controlled
The ability to create and modify connections may be limited or removed by your deployment administrators. If these views are not available, they have been preset on the Anyware Trust Center and you can skip to Connecting to a Session.
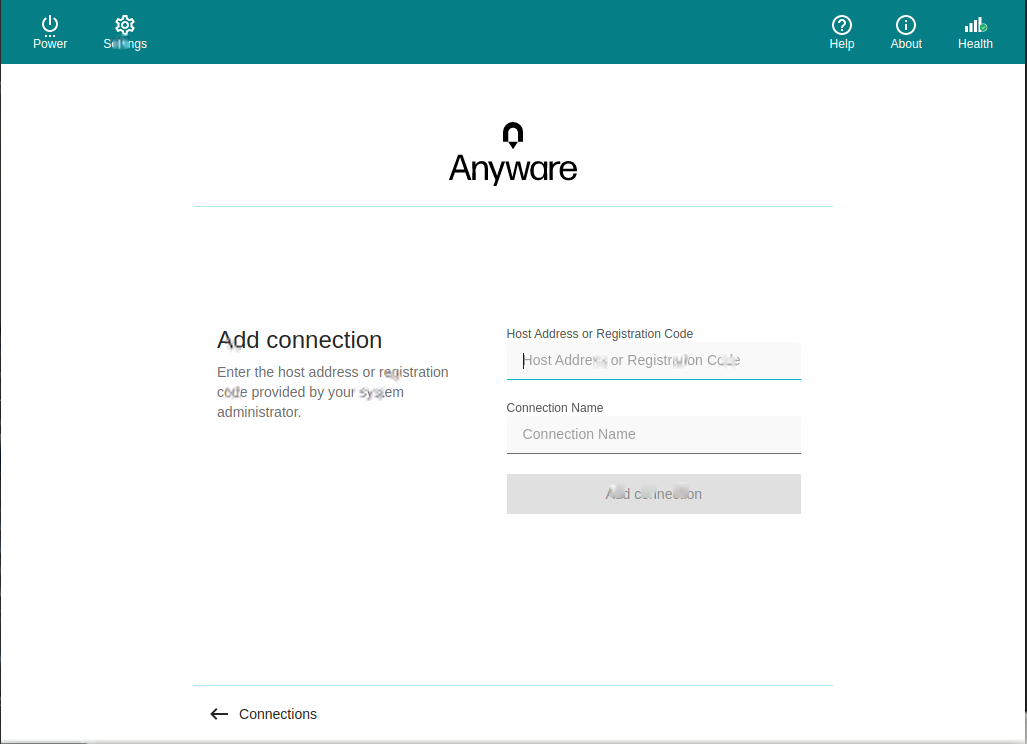
Create a new connection by clicking + Add a new connection at the bottom of the Connect pane. You can add as many connections as you like.
-
In the Add New Connection pane, there are two fields to provide:
-
Host Address or Registration Code: Enter the address of the remote system you want to reach (you should have this information from your system administrator). This field accepts IP addresses, domain names, and registration codes, as in these examples:
- An IP address:
123.456.789.012 - A FQDN:
remote-desktops.example.com -
A registration code:
a1b2c3!@#Note: Amazon WorkSpaces registration codes
If you are connecting to an Amazon WorkSpaces desktop, provide your WorkSpaces registration code in this field.
Note: VMware Horizon connections (beta)
To connect to a VMware Horizons broker, provide the address of the Horizon broker in the Host Address or Registration Code field. Support for VMware Horizon connections is currently in beta, and may not always work as expected. If you use this feature and encounter problems, please open a support ticket and let us know what's happening.
- An IP address:
-
Connection Name (optional): If desired, provide a name for this connection. This can be anything; you will use this name to select this connection in future sessions. You can always change it later.
-
-
Click Add connection.
Once this is done, your connection will appear as a button in the desktop selection list.
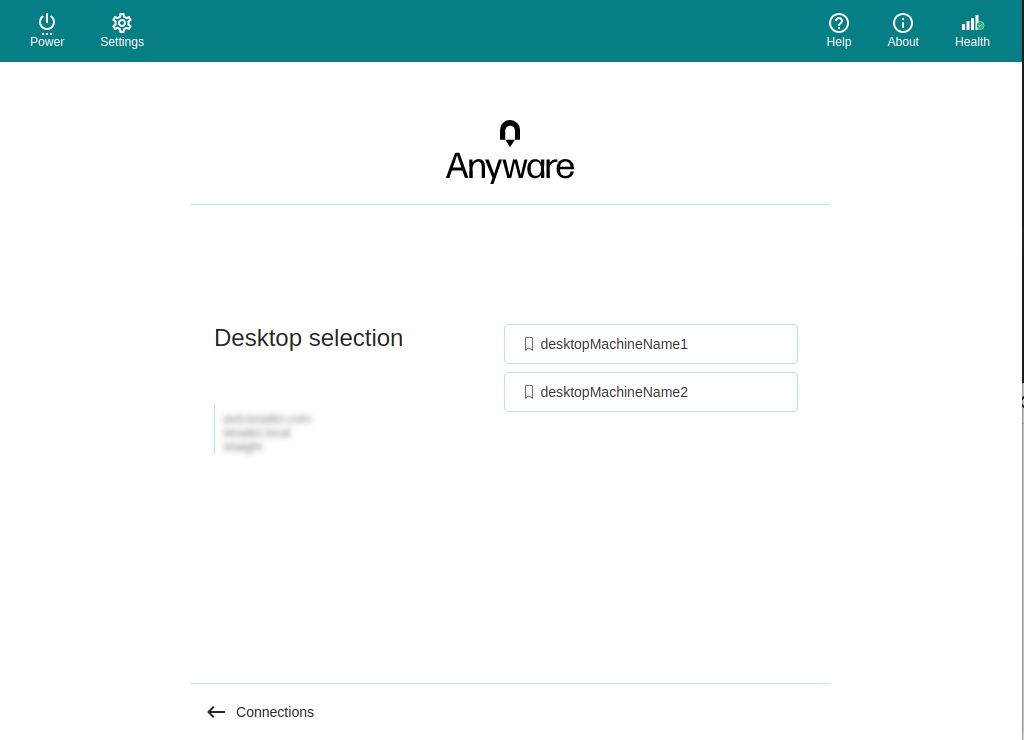
Connecting to a Session
-
If you have created at least one connection, the Trusted Zero Client will now look something like this:

-
Click the name of the connection you want. Next, provide your username and password:
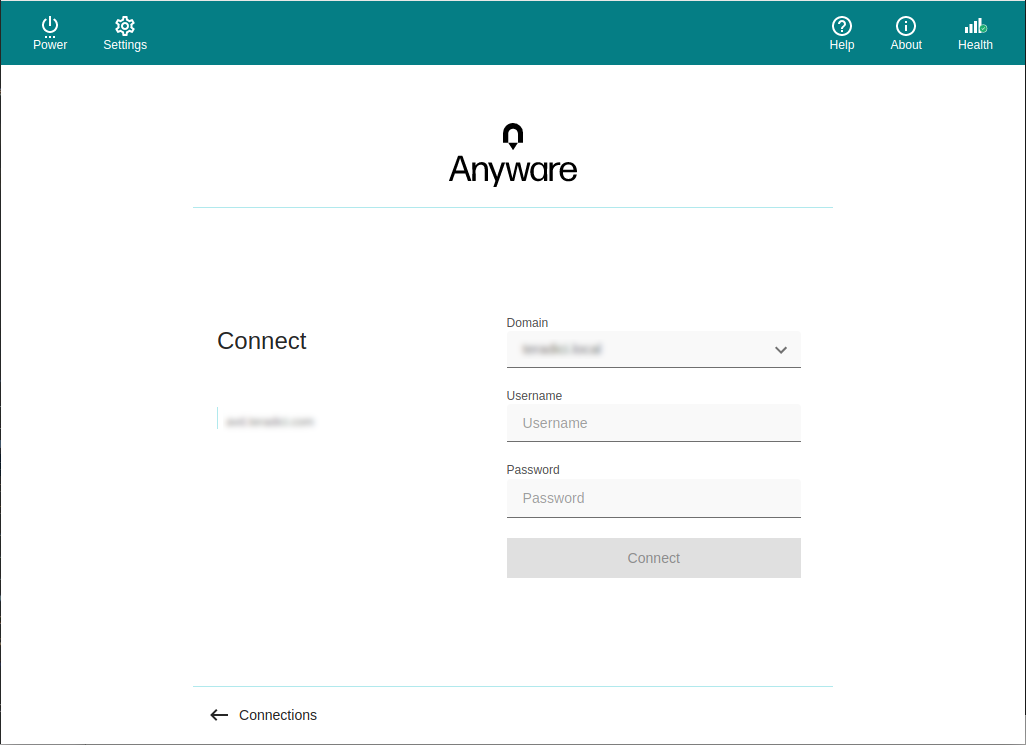
Note: About authentication credentials
For managed connections, the authentication screen and validation that happens here is provided by Anyware Manager or by your connection manager. The credentials are supplied to you by your system administrators, and are usually your corporate credentials.
For direct connections where no broker is present, use the credentials for your user account on the remote machine.
-
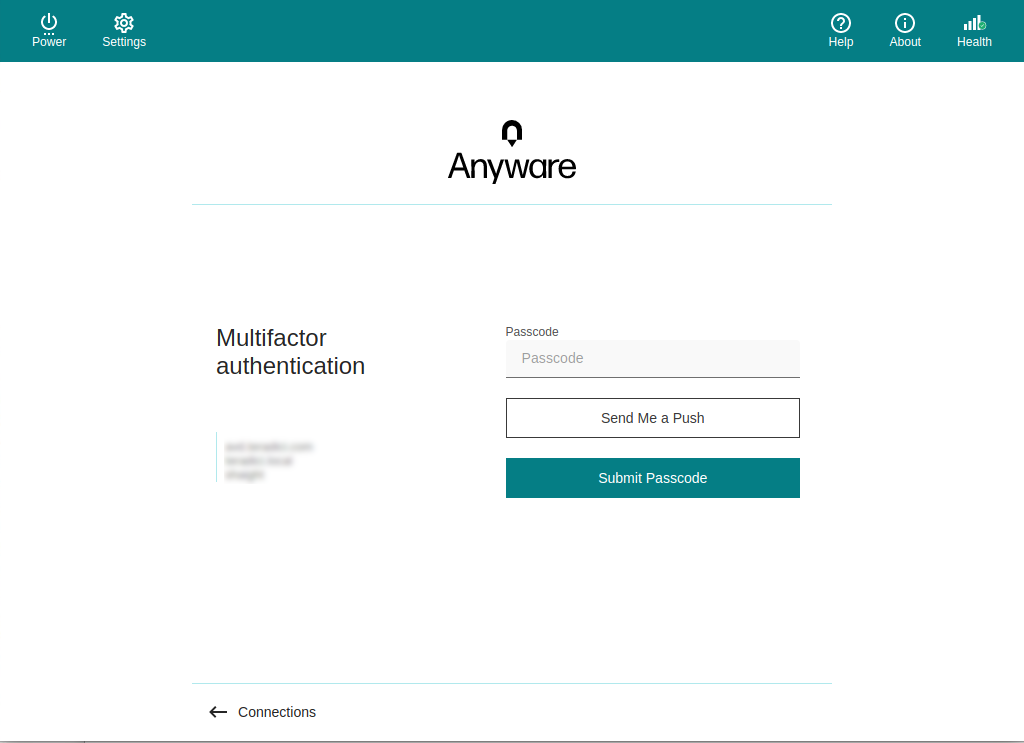
If configured, you will see a Multi-Factor Authentication (MFA); the actual display shown will depend on your MFA provider and your IT policies. Follow the prompts provided in your interface.
-
Once your credentials are accepted:
- If you have a single desktop available, your connection credentials will be used to automatically log into it and your session starts immediately.
-
If you have multiple desktops available, the shows you a list of desktops. Click the desktop you want to connect to.
Tip: Managing desktops
You can change the labels that appear in this list to make them easier to identify, and may be able to remotely restart them as well (if supported). See Managing Desktops for instructions.
Once you have selected your desktop, you will be connected to it and your PCoIP session will begin. The first time you connect to a desktop, there may be a slight delay before the connection is active.
There may be a delay of a few seconds before you have control of your mouse and keyboard; this is normal.
Managing Desktops
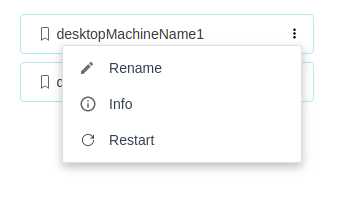
You can manage the desktops belonging to each of your defined connections. The following actions are available, when supported by the desktop:
- Rename the desktop's label in the client.
- Restart the remote desktop (if supported).
- Display information about the desktop, including its resource name and protocol.
To use these features, first authenticate display the list of desktops belonging to the connection, then select the action you want from the available desktops. These procedures are described next.
Rename a Desktop
By default, the Trusted Zero Client displays the machine names of your remote desktops. These names can often be automatically-generated strings that are difficult to identify or differentiate. You can modify the name shown in the desktop list to give them human-friendly names that are easier to understand.
Note: Only labels are changed
This procedure changes the label shown in the client interface. It does not change the desktop's machine name.
To change a desktop label:
- Display the desktop list as described above.
-
Click Rename:
-
Provide a new name to use in the desktop list. Note that once this is done, the default machine name will no longer be visible; if you need to see it later, see View Desktop Information.
Restart a Desktop
You can send a restart command to a remote desktop from the client interface, if supported by your remote system.
Note: Not all deployments support this feature
The restart option is only be available if your remote system supports it. If it does not, the option will be disabled.
To restart a remote desktop:
- Display the desktop list as described above.
-
Click Restart Desktop:

The remote desktop will be restarted. Note that it will be unavailable for connections until the restart is complete, which may take several minutes.
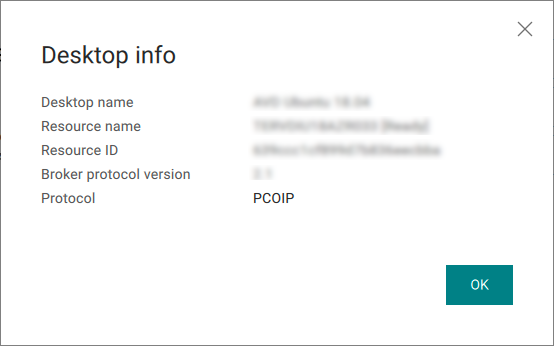
View Desktop Information
You can view detailed information about each of your available remote desktops, including resource names, IDs, and protocols.
Tip: Desktop machine names
If you have renamed a desktop, the original machine name is the resoruce name shown here.
To view desktop info:
- Display the desktop list as described above.
-
Click Info:
-
Review the displayed information.
-
To dismiss the info window, click OK or click the close button in the top corner.
Connecting to Amazon WorkSpaces
Amazon WorkSpaces connections use the same process described above. Provide your registration code in the Host Address or Registration Code field, and the Trusted Zero Client will recognize it as a WorkSpaces registration code and handle it appropriately.